Setting up MyPrayers on an iPhone
The first in a series of three tutorials on how to set up and use MyPrayers on an iPhone.
For this tutorial we will use an iPhone as the device. MyPrayers also works on an iPad, but the layout will be a little different. You should still be able to follow along, but you may have to search for items referenced in a different place. We hope to add an iPad version of the tutorial as soon as possible, God willing.
The importance of the setup process
Setting up is important and worth spending time doing properly, as it will make for a better experience when preparing for and giving your prayers. That said, you will more than likely make several adjustments before you get it how you like it. What’s more, it’s always good to review and make changes so you don’t fall into ruts and formulaic prayer.
What we plan to do
It’s a good idea to get familiar with the basic process and key areas of MyPrayers. That way you can plan how you want to use MyPrayers.
Our objective, then, is to run through each of the major areas of setting up using some typical things we would want in our prayers. Follow along, as it’s so much easier learning when you actually do it.
Let’s begin…
Looking at the Organiser
Open the MyPrayers App.
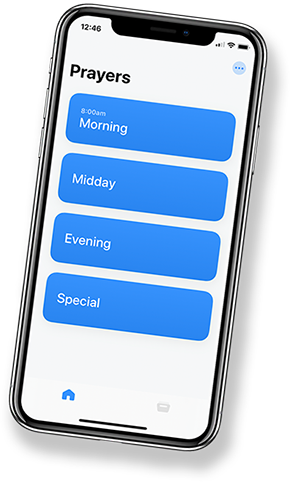
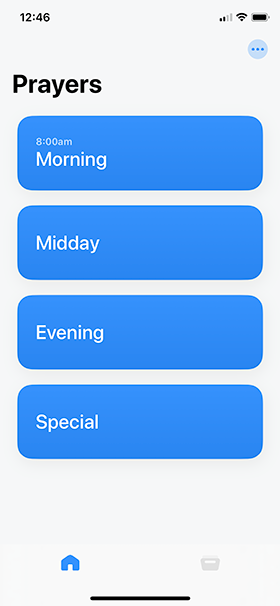
More than likely, the app will open on the Home page (as you see in the image of the iPhone above). To set up, you need to go to the Organiser. Tap on the Organiser button (the filing cabinet icon) at the bottom right of your screen.
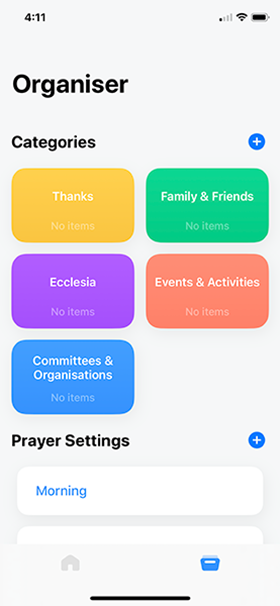
This is the Organiser screen.
This page is divided into two parts under the headings Categories and Prayer Settings. Both areas contain several default items to make it easy for you to start the process of setting up.
Categories and Prayer settings are closely linked, for you need to work out when you will give your prayers, and what you will pray for in each of those prayers. We have taken the biblical approach of Morning, Noon, and Evening as the default, but you need to work out if that is what you wish to do. What’s more, you may want to pray for different things in each of those prayers.
We shall first set up our Prayer times.
Prayer Settings
About Prayer Settings
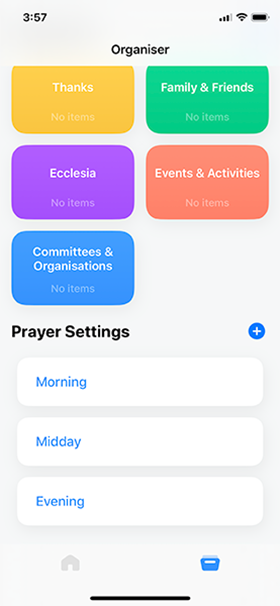
Prayer Settings include three default Prayers (or, times for prayer):
- Morning
- Midday
- Evening.
This follows the practice of many faithful people of the Bible. The general practice in accordance with the Law for tabernacle worship (Exodus 30:7–8 was for prayer in the morning and evening). David, Daniel, and Peter also prayed at midday (Psalm 55:17; Dan.6:10,13; Acts 10:9). It is up to you how often you set your prayer times.
To set up Prayer Settings
Scroll down to Prayer Settings.
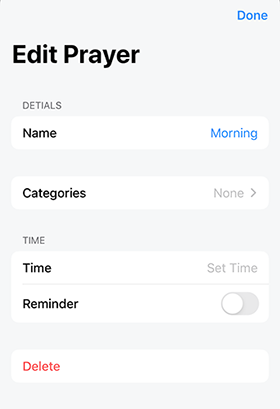
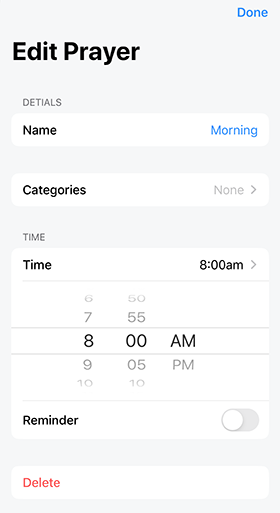
Tap on Morning. You should open the Edit Prayer page for Morning.
Set the time for this prayer:
Tap on the word Time. You will now see the familiar iOS time setter. Set it to the time you want for your morning Prayer. I have set it to 8.00am.
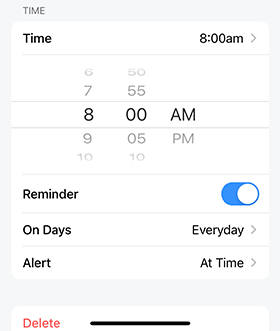
Now tap on the Reminder slider button (to the right of the word Reminder).
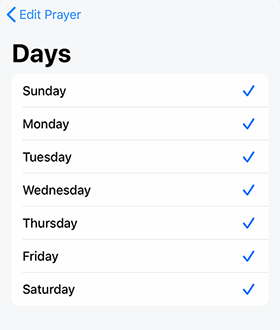
You have a few more options open to you now. You can set what days you wish to give this Prayer (and be reminded of it). By default it is set for Everyday, but if you tap on the arrow to the right, you are able to set what day of the week you want to be reminded to give this Prayer.
Once you have selected what days you wish to give this Prayer, tap on < Edit Prayer at the top left of the screen. You should arrive back at the previous screen with the Time settings.
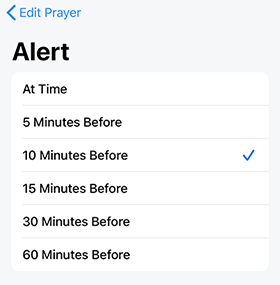
Tap on Alert.
Set when you would like to receive the alert for this Prayer. We have set it for 10 minutes before:
Once you have set your alert, tap on < Edit Prayer at the top left of the screen.
You are now set up for your Morning Prayer!
Tap on Done at the top right of the screen.
Try setting up the other Prayer times yourself.
These three Prayers (if you set them up) will be your basic prayers for each day. However, you may wish to add different Prayers for a certain day in the week. For example, on weekends you may want to pray for different items than those during the week. Or, there may be special prayers you would like to give on specific occasions. For example, Nehemiah and his friends prayed each day for a specific petition (Nehemiah 1) for a period of time. Let’s add a new prayer.
Add a new Prayer
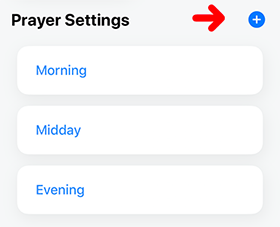
While in the Organiser screen, tap on the plus sign to the right of the Prayer Settings heading:
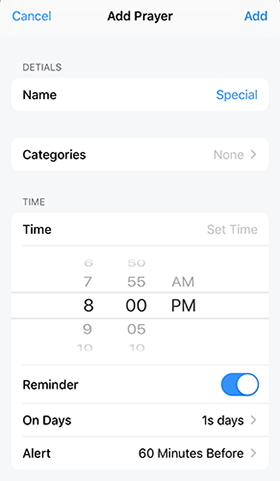
You are now on the Add Prayer screen. Tap on Name. Your keyboard should appear.
Type in the name you want to give this Prayer. We will give it the name “Special”.
Now, set the time, day of the week, and your alert time as we have shown above.
Once you are back on the Add Prayer screen…
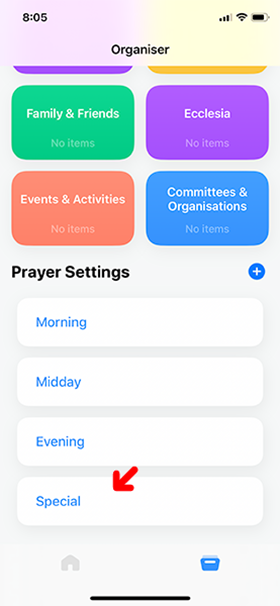
… tap on the word Add at the top right of the screen. You should come back to the Organiser main page.
You have now added a new Prayer!
Now we need to set up what we would like to pray for in each of these Prayer times. To do that, we need to set up the Categories, Items, and Notes.
Categories, Items, and Notes
About Categories, Items, and Notes
Categories are really major parts of a prayer. For example, the Lord’s Prayer is structured essentially into the following parts, divisions, or sections:
- Invocation
- Petitions for God’s glory
- Petitions for our own need
- Praise to God
These parts, are called Categories in MyPrayers. MyPrayer’s include five default Categories: Thanks, Family & Friends, Ecclesia, Events & Activities, and Committees & Organisations. These are purely suggestions to give you a start.
There are many Categories we could add to the default list. For example:
- Praise
- The Lost
- The Sick
- Those suffering trials
- Gospel proclamation
Under each of these “categories” or areas of prayer, we will need to add the items we wish to pray for. In MyPrayers, these specific items are called “Items”! So, in the Lord’s Prayer, we would add specific items under their area or categories:
Invocation:
Our Father, which art in heaven
Petitions for God’s glory:
Hallowed be thy Name
Thy kingdom Come
Thy will be done in earth as it is in heaven
Petitions for our own need:
Give us this day our daily bread
Forgive us our trespasses as we forgive others their trespasses
Lead us not into temptation
Praise to God:
For thine is the kingdom
The power
The glory
The Lord’s prayer is a beautiful example of simplicity of thought and words. There are, of course, other types of prayers as our Lord, himself, demonstrated in his life, as well as prayers of other worthies of old. When Paul prayed for individuals, he didn’t just pray for a list of names; he prayed specific things about and for them. That’s what we need to do, too. That’s where Notes come in.
Notes provide the means for adding information to an Item we wish to pray for. So, for example, we have a category called Ecclesia—where you can, among other things, specifically pray for people who belong to your Ecclesia (or, congregation), you can write specific information about that person you wish to mention in your prayers. It’s like this:
Category: Ecclesia
Item: Sally Smith
Note: Thanks for her dedication and care for others.
Note: Thanks for her service in the Gospel proclamation effort
Note: Help for her failing health
We’ll look at adding items and notes soon. First we need to do the higher-level planning.
Categories
To set up Categories
First, you need to assess if you are happy with the default categories. You can change the name of any Category, and you can add or delete a Category. It is worth taking the time to work out the areas you would like to include in each of your prayers. Jot them down so that you can speed up the process of setting it up in MyPrayers. However, you are able to develop and adjust as you go. But, if you already have a tried and true approach to prayer, you may wish to adapt MyPrayers accordingly.
Let’s do the following:
- Add a new Category
- Add Categories to each of our prayers
- Change a Category name and colour
Add a new Category
Let’s add a Category called Praise.
Go to the Organiser (if you are not already in there, tap on the file icon.
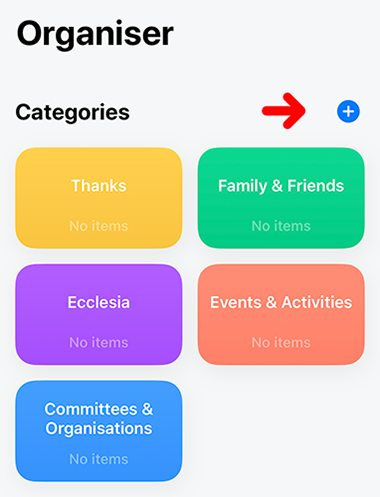
Tap on the blue button with the white plus sign to the right of the Categories heading:
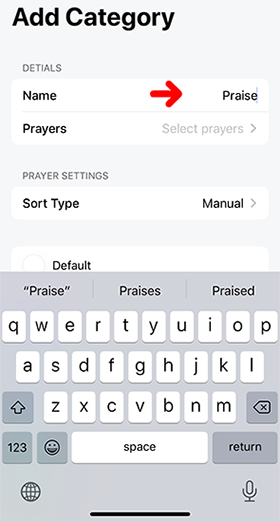
Once in the Add Category screen, tap on Name. Your keyboard should appear.
Type in the name you wish to give this Category. I shall type in “Praise”.
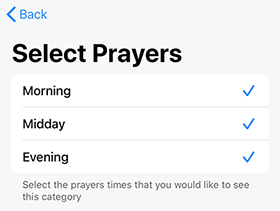
Tap on Prayers (just below Name). Your screen will open at the Select Prayers screen, which we met under the Prayer Settings exercise. Here you select all the Prayers that you wish to add the Category to appear in. I shall select all of my prayers.
Tap on < Back at the top left of the screen.
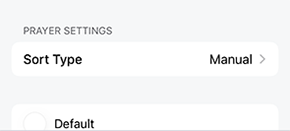
Tap on Sort Type.
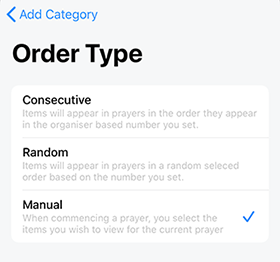
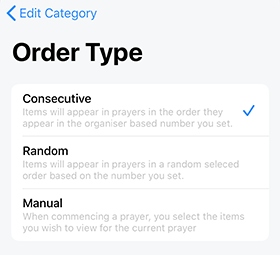
The Order Type screen should open:
This is where you select how the Category items will be available to you when in Prayer Preview mode (when you prepare the items you wish to pray for at prayer time).
Let’s explore each of these options.
Manual
By default, Manual is selected. As the explanation says, when commencing a prayer (during the Prayer Preview process), you manually select the items under this category that you wish to pray for.
Consecutive
This option allows you to rotate consecutively through a list of items within the Category according to a predefined number each time you pray. For example, you may have 60 members of your ecclesia (congregation). Because you would like to give time praying for each member, you can only pray for five members each time you give your morning prayer, the Consecutive option provides this functionality.
Tap on Consecutive. Now tap on < Add Category at the top left of the screen
You are now back in the Add Category screen. Notice that under Sort Type, two new items have been added.
Items Per Prayer. The default is 3. You can change this to whatever number you wish by tapping on Items Per Prayer
ShowItems With No Notes: This is so, when you have selected the Consecutive option and it doesn’t contain notes under each item, it will still show up in your Prayer Preview mode and Prayer mode list.
Now, tap again on Sort Type. The last item of the Order Type options is:
Random
Random operates similarly to the Consecutive option, but instead of rotating in order through your list, it selects from the list randomly. If you select this option and go back to the Add Category screen you will find you have the same options available to you as you did for the Consecutive options (eg., Items Per Prayer, and Show Items With No Notes).
I’m going to leave this Praise Category as Manual, as I’d like to manually think about and select each Item I wish to give Praise to God for each time I pray. So I tap back on Sort Type and change the setting to Manual.
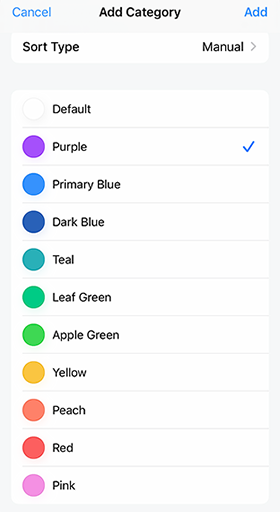
Tap on < Add.
Now, select from the list of colours available for your Category. You may wish to use the colours to colour-code your Categories. For example, you may want to have anything that is to do with God as Purple, anything to do with People as Pink, and anything organisational as Leaf Green. It’s over to you.
I will select Purple.
Tap on Add at the top right of your screen.
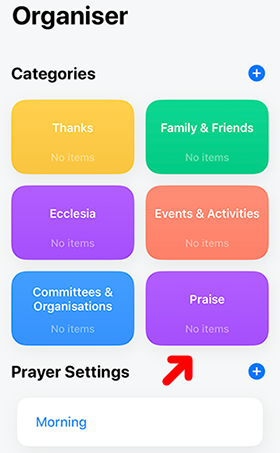
The Category, Praise, has now been added.
Note: The order of the list of Category cells is important. Each Category (if selected for a Prayer) will appear in the order that they appear here in the Organiser. So, looking at the image above, the order goes from left to right and down the page, as follows:
- Thanks
- Family & Friends
- Ecclesia
- Events & Activities
- Committees & Organisations
- Praise
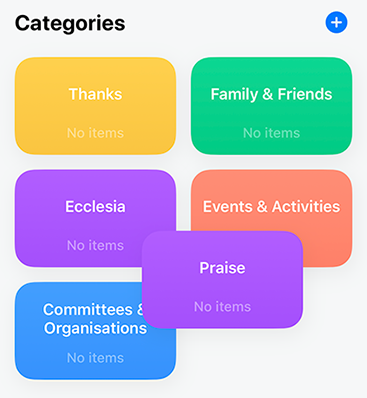
I’d like matters of Praise to be the first in my prayers. To do this, we must move the new Praise Category cell to the top of the Category list.
Tap and hold on the Praise cell.
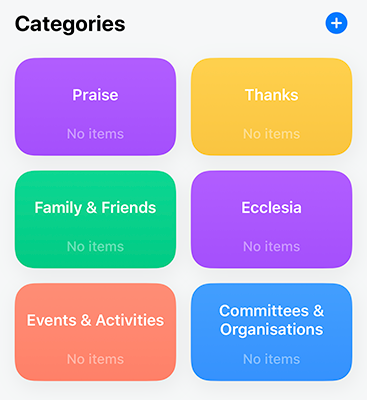
Now, move it to the top of the list.
Now Praise will appear first in whatever Prayer you assign the Praise Category to. We’ll do that shortly. But first, a good question.
What if you open and close your prayers with praise? You could always add an “Opening Praise” Category and a “Closing Praise” category. It is up to you to set up your Prayers as it suits you. I tend to use my Praise Category for specific items I wish to praise God for. Concluding praise is something I leave to my own thoughts and feelings at the time I conclude. And that’s a point to remember: we shouldn’t be so rigidly beholden to the app—it’s just a prompt tool. However, you will have your own way of doing things, and, as you begin to use the tool, you will be able to adapt to what works for you.
While you’re here, you may like to:
- Add other Categories
- Rearrange the other Categories into an order you would like them
Now that matter of assigning Categories to specific Prayers. Let’s do that now.
Add an existing Category to a Prayer
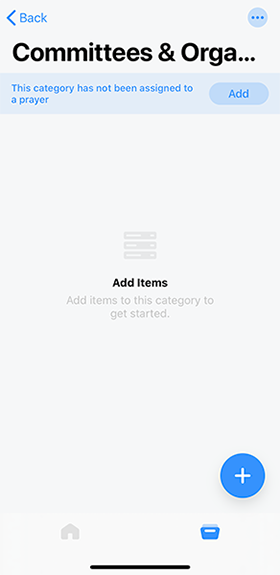
Tap on any of the default Categories. We’ll choose Committees & Organisations.
The Committees & Organisation screen will open:
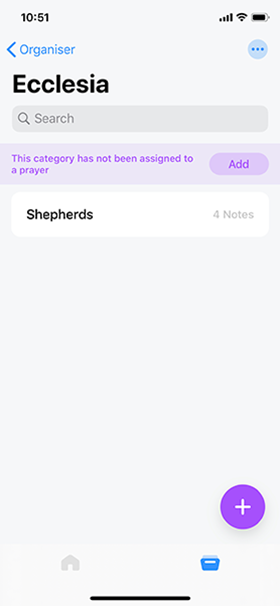
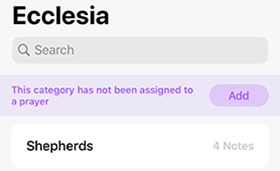
At the top you see a message that this Category hasn’t been assigned to a Prayer. Tap on the Add button to the right of the message.
You will now see the familiar Select Prayers screen which we have seen under the Prayer Settings exercise.
Once you have added this Category to the Prayers you want (I have selected Evening prayer), tap on Done (top right of the screen). Now the Committees & Organisation screen has no message about allocating prayers. Tap on Back (top left).
That’s how you add an existing Category to specific Prayers.
One other thing you may want to do is change a Category name or colour. Let’s do that.
Change a Category name and colour
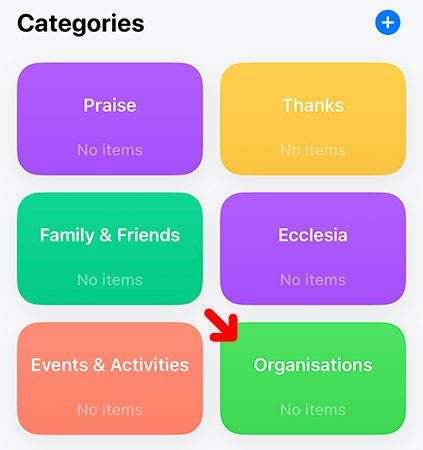
Committees & Organisations is a bit long for my liking, so let’s make that simply, “Organisations”.
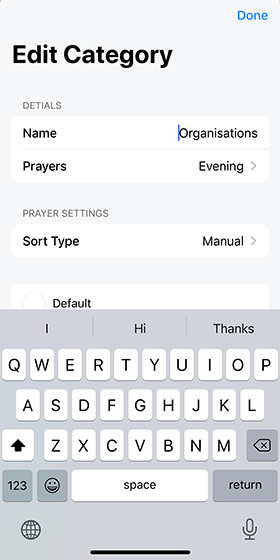
Tap on the Committees & Organisations Category cell again. Now, we need to get into the back end of the Category to make cosmetic changes. The way we do this is to tap on the More button (the three dots, or ellipsis symbol) at the top right . It looks like this:
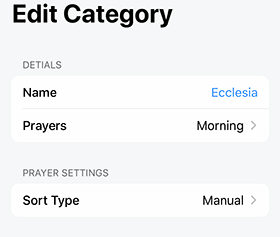
You are now in the Edit Category screen
Tap on the Name Organisations & Committees cell, (the keyboard will slide up) and change the name to “Organisations”.
Slide the keyboard down so you can access the colours. Change the colour to what you prefer. I’ll change mine to Apple Green.
Tap on Done (top right).
Your Category name and colour has been changed.
Go ahead and make changes to other Categories as you want.
Once you’ve done this, we need to move on to adding Items for which we wish to pray under each of our Categories.
Adding Items and Notes
Items are the nitty gritty of our prayers. So far, we’ve been looking at the overall and structure of our Prayers. Now we need to add the actual things we want to say in our prayers.
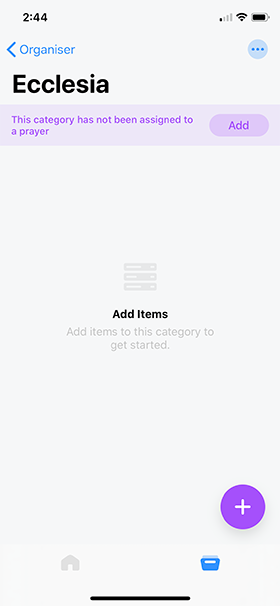
To add an Item, you need to tap on the Category to which you wish to add an Item. We shall choose Ecclesia (or, congregation). I choose this so we utilise some of the other features we’ve not yet seen.
Notice, I haven’t assigned this to any Prayer yet? That’s so we can demonstrate some other features. For now, we want to add an Item.
Tap on the big coloured plus button at the bottom right of your device’s screen. The colour will be the same as the Category colour you have assigned it. In my case, it’s still the default purple.
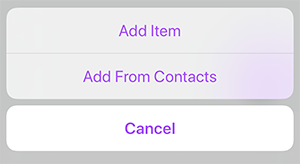
You now have three options present to you:
- Add Item: So you can add a single item.
- Add From Contacts: So you can add from your Personal Contacts on your device
- Cancel: So you can escape from this screen.
We are going to begin by adding an item.
Add an Item
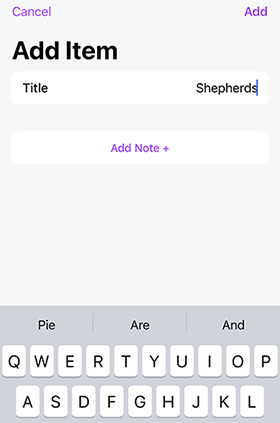
Tap on Add Item.
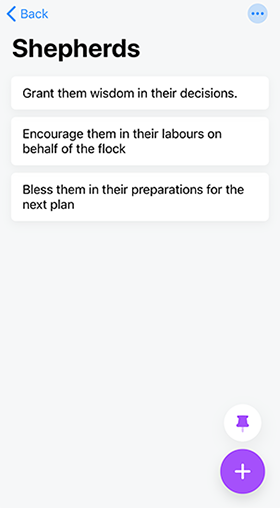
Type in a Title for your item. I shall add “Shepherds”, so I can pray for the shepherds of my local ecclesia.
Notice that you can add Notes from this screen? While we are here, we may as well add a note or two.
Tap on Add Note +.
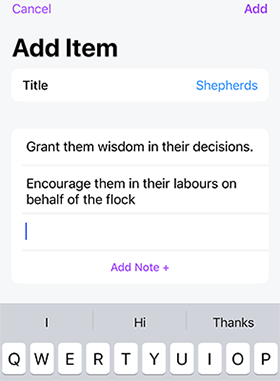
Type in your note. I’m going to type in “Grant them wisdom in their decisions.”
Let’s add another note. Tap on Add Note +
Type in another note. I’m going to add “Encourage them in their labours on behalf of the flock”.
And, I’ve just thought of another, so I’ll add, “Bless them in their preparations for the next plan”.
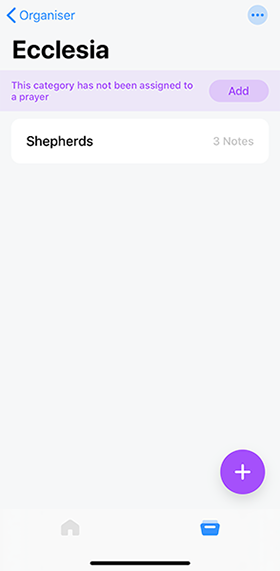
That should do for now. We can always come back later and add to the list of notes. Tap on Add (top right).
Notice how you have three notes in grey next to Shepherds? Tap on the Shepherds cell.
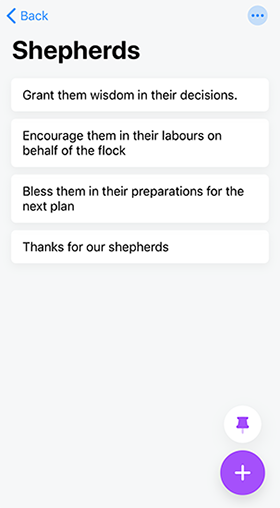
There are your three notes. Hmm. I just realised that I’ve forgotten to thank God for our shepherds! Tap again on the big (purple) plus button again, and add another item: “Thanks for our shepherds”, and then come back to this screen.
It should look like this:
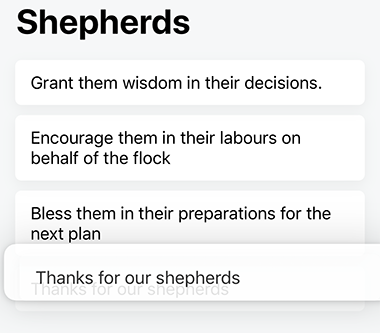
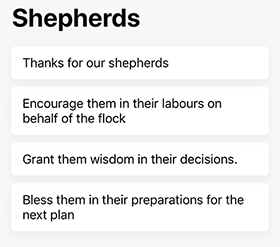
But, now I’d like to rearrange the order. I’d like to thank God for the Shepherds first.
Tap and hold on the “Thanks for our shepherds” Note cell, then move it up to the top of the list.
Now, move the note “Encourage them in their labours on behalf of the flock” to second in the list.
Now, I’d like to add the rest of my ecclesia as Items to the Ecclesia Category. To do this, I’m going to use my Contacts list.
Add from Address Book Contacts
If you’d like to add people from your Contacts, too, you need to at least have the names of each person in your device’s Contact list.
From the Ecclesia Category page, tap on the big plus button.
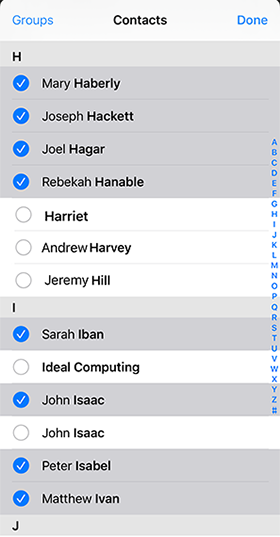
Tap on Add From Contacts. Your contact list will open. In the following list, all personal names are fictitious.
Tap on the names of all you want to add to your prayer list.
Tap on Done (top right).
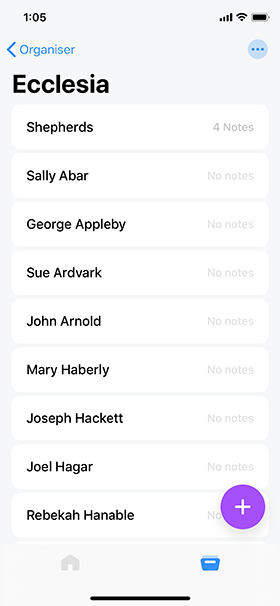
All those names are now added as Items to your Ecclesia Category.
Really, when praying for people, we shouldn’t just list off their names as if they’re objects. Nor should we try and think of what to say about these people on the spot at the time of our prayer. It’s best to genuinely think about each person: their circumstances, their needs, their troubles, their service, their faith, and also things to thank God for about each of them. This is real prayer. So, it’s a good idea to spend the time going through your list and adding Notes to each person. Because my tutorial is using a make-believe list, we won’t do that here, but we’ve already shown you how to add Notes.
What’s left is to:
- add the Ecclesia Category to a Prayer time
- Add the Sort Type for this Category
At the top of the screen is the note about the fact that the Category hasn’t been allocated to a Prayer.
Tap on the Add button.
I’m going to add this to my Morning prayer.
Tap on Done.
Set to Consecutive Rotation
Now, I know I am not able to go through my whole ecclesial list every morning (especially seeing that there are seventy of them, and especially if I want my prayer for each member of the ecclesia to be meaningful. If I pray for, say, 5 members each day of the week in a cycle, I can therefore go through the whole ecclesia once every two weeks. If I was able to pray for 10 members each prayer, I could get through the whole ecclesia once a week. You need to work out what works best for you.
For purposes of illustration I have 12 people added as Items to this Category. I’m going to set the number to 4 each Morning prayer on a consecutive cycle. How do I do this?
If you are back on the main Organiser page, tap on the Ecclesia Category cell.
Tap on the More icon
Tap on Sort Type
Select Consecutive by tapping on that cell.
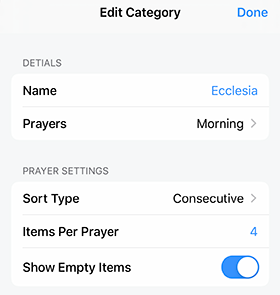
Tap on < Edit Category
Now we need to set the number of items will appear in the consecutive list each for each Morning prayer. I want that to be 4, so tap on the default 3 and change the number to 4. To remove the keyboard tap on the keyboard’s Done.
Just in case I don’t have any Notes for some of the people in the list, I still want their names to appear in the cycle each time, so I need to tap on the Show Empty Items slide button. Do that.
Tap on Done (top right)
Now, lets see what this looks like in Prayer Preview mode and see if this works!
Tap on the grey Home (the grey house) button at the bottom left of your device screen.
This is the Home page, which allows you to launch into Prayer Preview mode for any of your Prayers.
Tap on the Morning cell. You have now entered into Prayer Preview mode.
Depending on whether you have done exactly what I have done, you should see the following screen:
Note: If you have followed along this tutorial exactly, you may be wondering about the fact that we put the Praise Category first, so where is it! That’s because you have no Items added to the Praise Category yet. If you were adventurous and went ahead and added items within the Praise Category, your screen will have a list of the items you put in the Praise category (or any other Category that comes before the Ecclesia Category. To follow along with me, you will need to tap on Next at the top right of your screen until you come to the Ecclesia page.
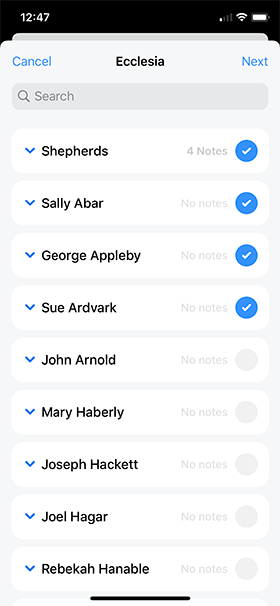
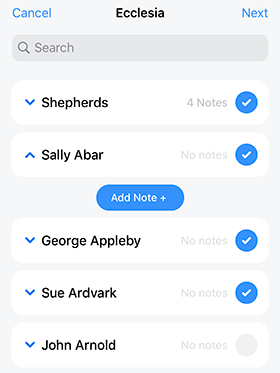
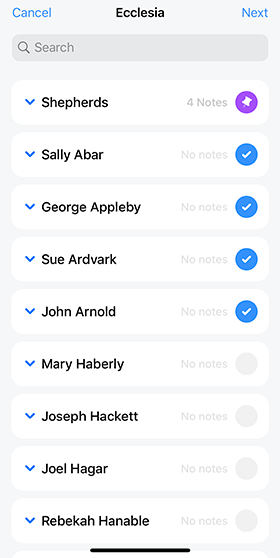
Just looking on the Ecclesia page in Prayer Preview mode you will notice that you have a list of all the Items you entered into this Category, but the first four items have a blue button with a tick in it. These are the first of the cycle that we’ve set up. You can also see that you have Notes for the first item but nothing for any of the others. Tap on the name of one of the people you have entered. I’ll tap on the name of Sally Abar:
You can now add a Note from this Prayer Review mode screen.
But, looking at this list, I can see that Shepherds (the first item) is included in the cycle! I would like to pray for them each morning prayer. What can I do? We need to go back to the Organiser.
Tap on Cancel (top left).
Tap on the Organiser (file) icon (bottom right)
If your screen doesn’t open to the Ecclesia Category immediately, then navigate to it.
Tap on Shepherds (at the top of my list).
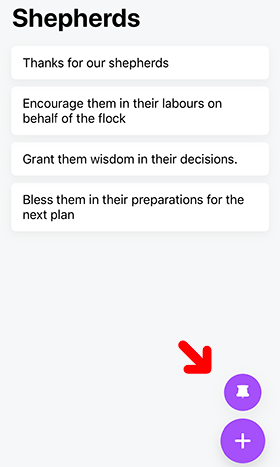
Notice the Pin button just above the big plus button at the bottom right of your screen.
Tap on the pin button. The Pin Item page should open.
Select which prayer or prayers you are going to pray for the shepherds. Notice, this may or may not be the same as the number of times you will use the Ecclesia Category in your prayers. You are pinning this item so it always appears regardless of the cycle for each of the other items in the list. I’m going to pin the shepherds as part of my Morning prayer, so tap on Morning…
… then tap on Done (top right).
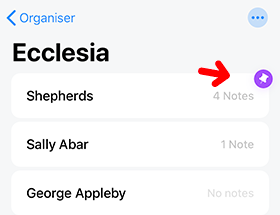
You’ll see that the Pin button is now coloured differently. What’s more, if you tap on Back (top left) and go back to the Ecclesia Category page, you will see that Shepherds also now has a pin icon attached to it.
But, let’s check back in the Prayer Review mode screen. Follow the same procedure as we did above and go back to the Ecclesia screen. Once we’re there, we see the following:
Shepherds now has a coloured pin symbol next to it, and the following four items in the list that have the tick symbols. It’s working as expected. Shepherds will always appear, and the others will cycle through four at a time in consecutive order.
Conclusion
This completes our tutorial. It should have given you a good idea of how to set up your prayers in MyPrayers. Go ahead and set yours up so you can start using MyPrayers as a tool for your prayer life. Setting up is the most laborious (and possibly the most technical part of the process), but it can also be a time of great reflection upon each of the areas and items you need to consider in the process. That’s a good thing. And, once you’ve done it, it should actually simplify the procedure, yet also make your prayers more meaningful.
We have already given you a glimpse into the Prayer Review mode, but you may like to go through the Prayer Review tutorial and then the Prayer View mode tutorial for ideas on how to use MyPrayers.
